Our latest demos feature Elementor-built headers, making customization as simple as editing any other page. By utilizing the Header Footer Builder, you gain complete control over your site’s header design and content.
How to Quickly Access and Customize Your Site Header
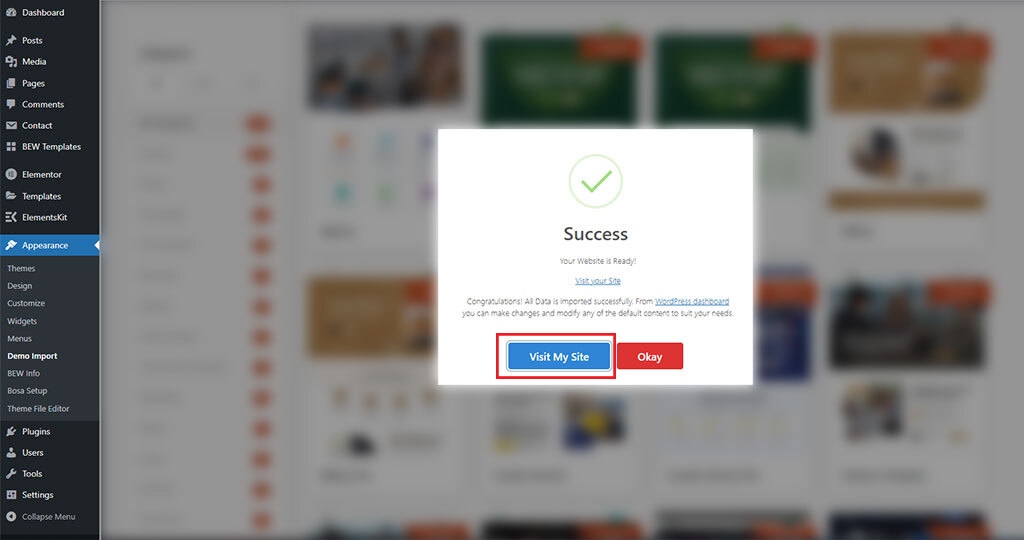
Once the demo import process is completed successfully, a success dialog box will be displayed. Click on Visit My Site to view the imported demo on your website.
To learn How to Import the Demo, please visit this detailed guide.
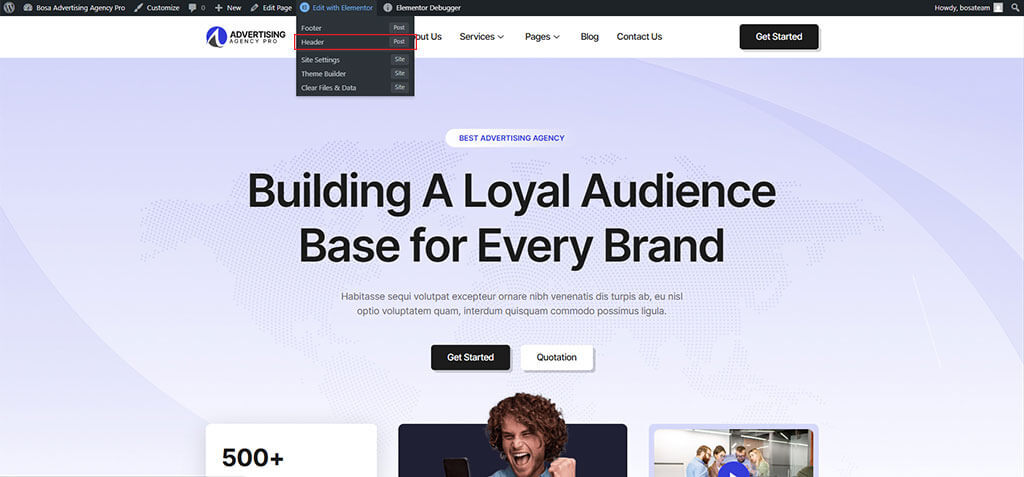
Once the preview page loads, follow these steps to customize your header:
- Hover over the Edit with Elementor menu in the top admin bar.
- Select Header from the dropdown list to modify the layout and design.
How to Set Up and Customize Headers from the Admin Dashboard
If you want to add a new header or modify your current layout via the WordPress dashboard, use the following steps:
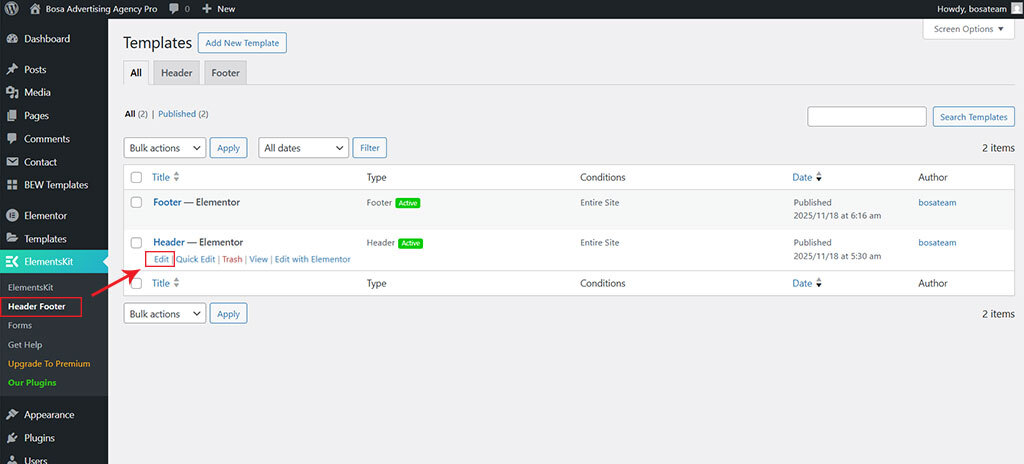
- Navigate to Dashboard > ElementsKit and follow the setup process.
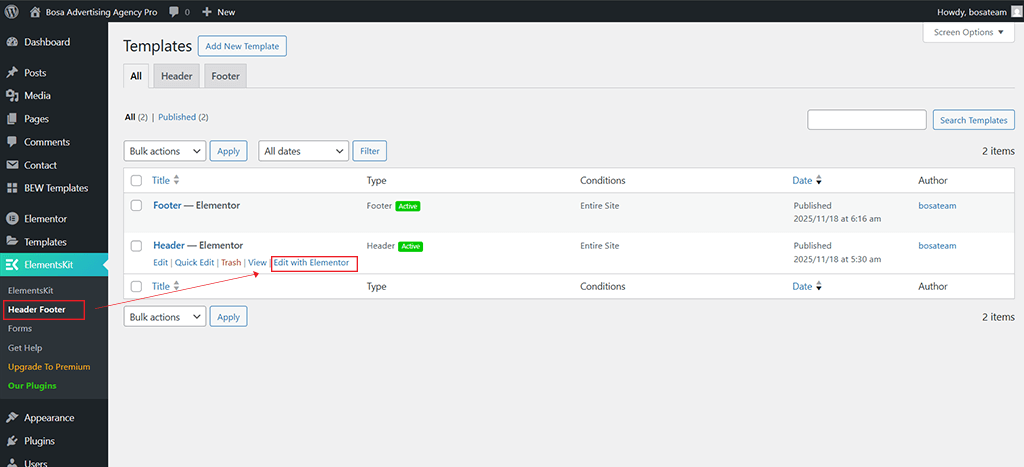
- Once the setup is complete, go to Dashboard > ElementsKit > Header Footer.
- Here, you will find the pre-defined Header and Footer pages.
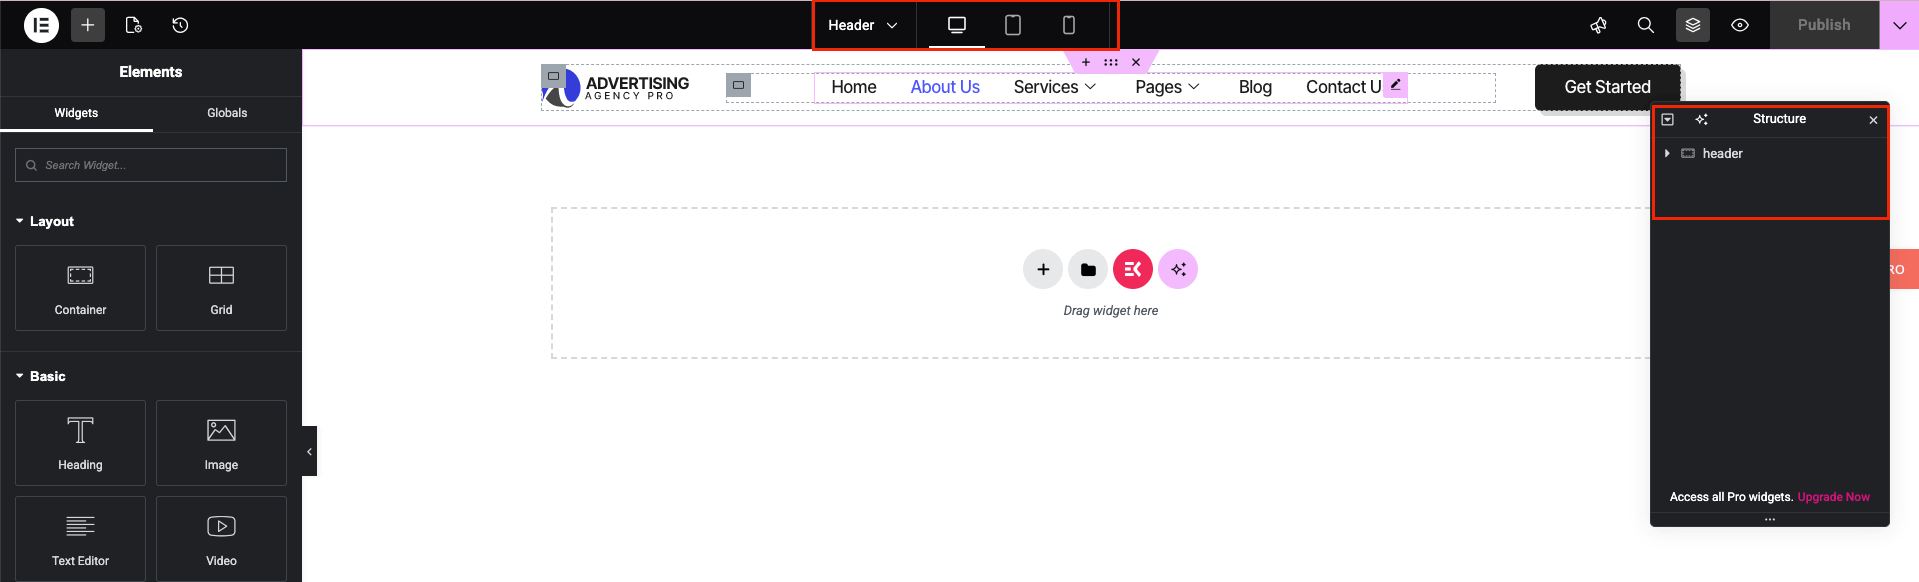
- To edit the Header, hover over it and click on Edit with Elementor.
- This will redirect you to the Header section, where you can customize it as needed.
How to change the Header Logo in ElementsKit
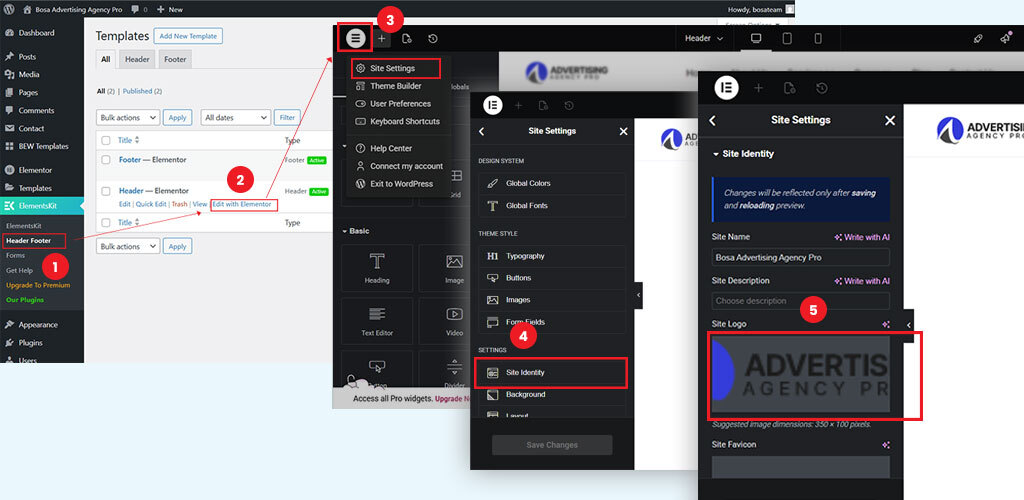
- Navigate to Dashboard > ElementsKit > Header Footer.
- Here, you will find the pre-defined Header and Footer templates.
- To change the header logo image, hover over the header template and click Edit with Elementor.
- Once the Elementor editor loads, click on the Elementor icon located in the top-left corner.
- A pop-up panel will appear. Navigate to Site Settings > Site Identity.
- Under Site Identity, you will find the Site Logo option, from where you can change the site logo.
How to Set Up Header Menu
To set up the header menu, follow the steps below:
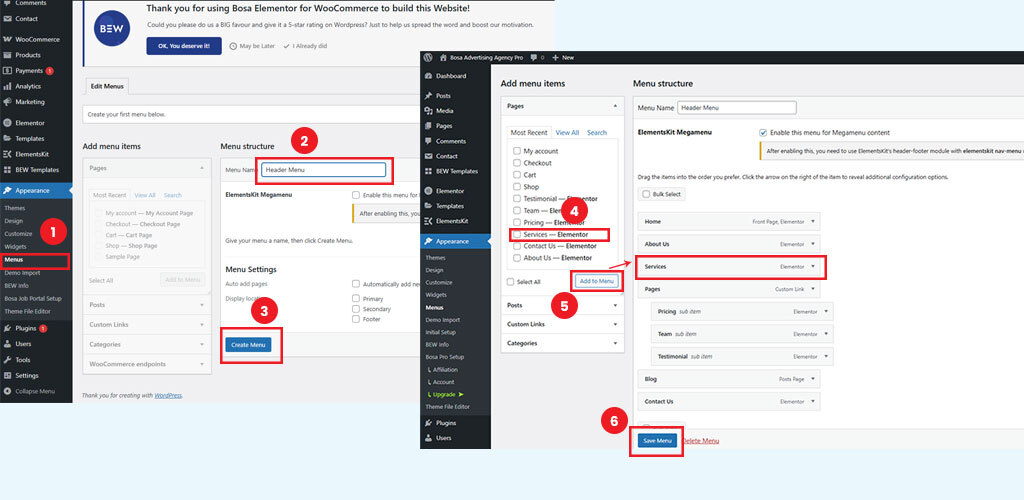
- Navigate to Dashboard > Appearance > Menus.
- Create a menu by entering your desired menu name and adding menu items as needed.
- Click Save Changes to store the menu.
- After setting up the menu, you can customize it using the Elementor Editor.
How to change the Header Menu in ElementsKit
- To Change the Header Menu, navigate to Dashboard > ElementsKit > Header Footer.
- Here, you will find the pre-defined Header and Footer pages.
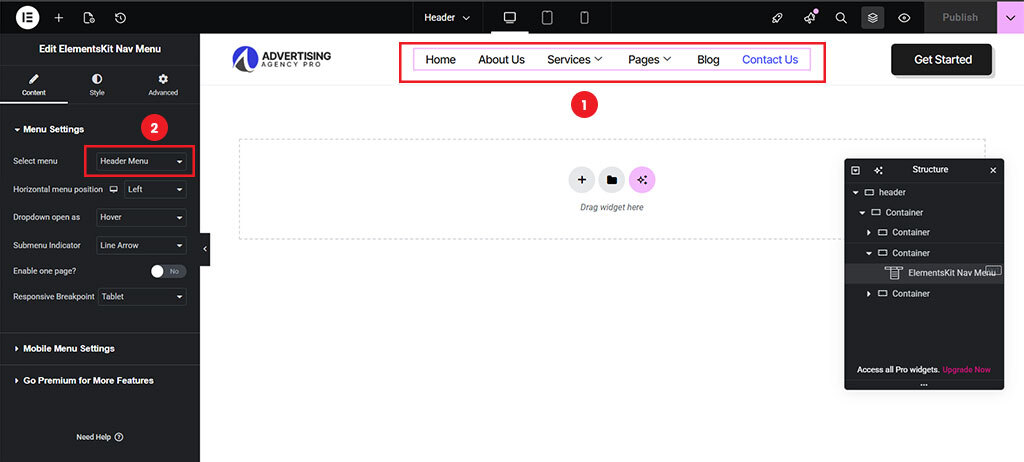
- To change the Header Menu, hover over header and click on Edit with Elementor.
- Once the elementor editor is loaded, then click on the Header Menu.
- In the left side you will see the edit panel, title named Edit ElementsKit Nav Menu.
- In the Content tab, you will see Menu Settings option, then choose the menu you want to insert using Select Menu option.
To learn How to Edit Mega Menu, please visit this detailed guide.
How to select Header/Footer for the Site
- Go to Dashboard > ElementsKit > Header.
- Hover over the header and Click on the Edit.
- Then It will popup Template Settings , you can find the different options.
- Title : Change the name of the header page.
- Type : Set it as header.
- Conditions : In which page to set.
- Activate / Deactivate
- Then Save Change.